High Dynamic Range (HRD) Photography
High Dynamic Range Photography (HDR) sometimes mistakenly called High Dynamic Resolution Photography, is a technique that allows for the capture of a wider range of luminosity than what is possible with traditional digital camera settings. The term “high-dynamic range” refers to the wide range of luminance levels that the human eye can see. HDR also refers to the wide range of luminance levels that digital cameras and computer screens are capable of reproducing.
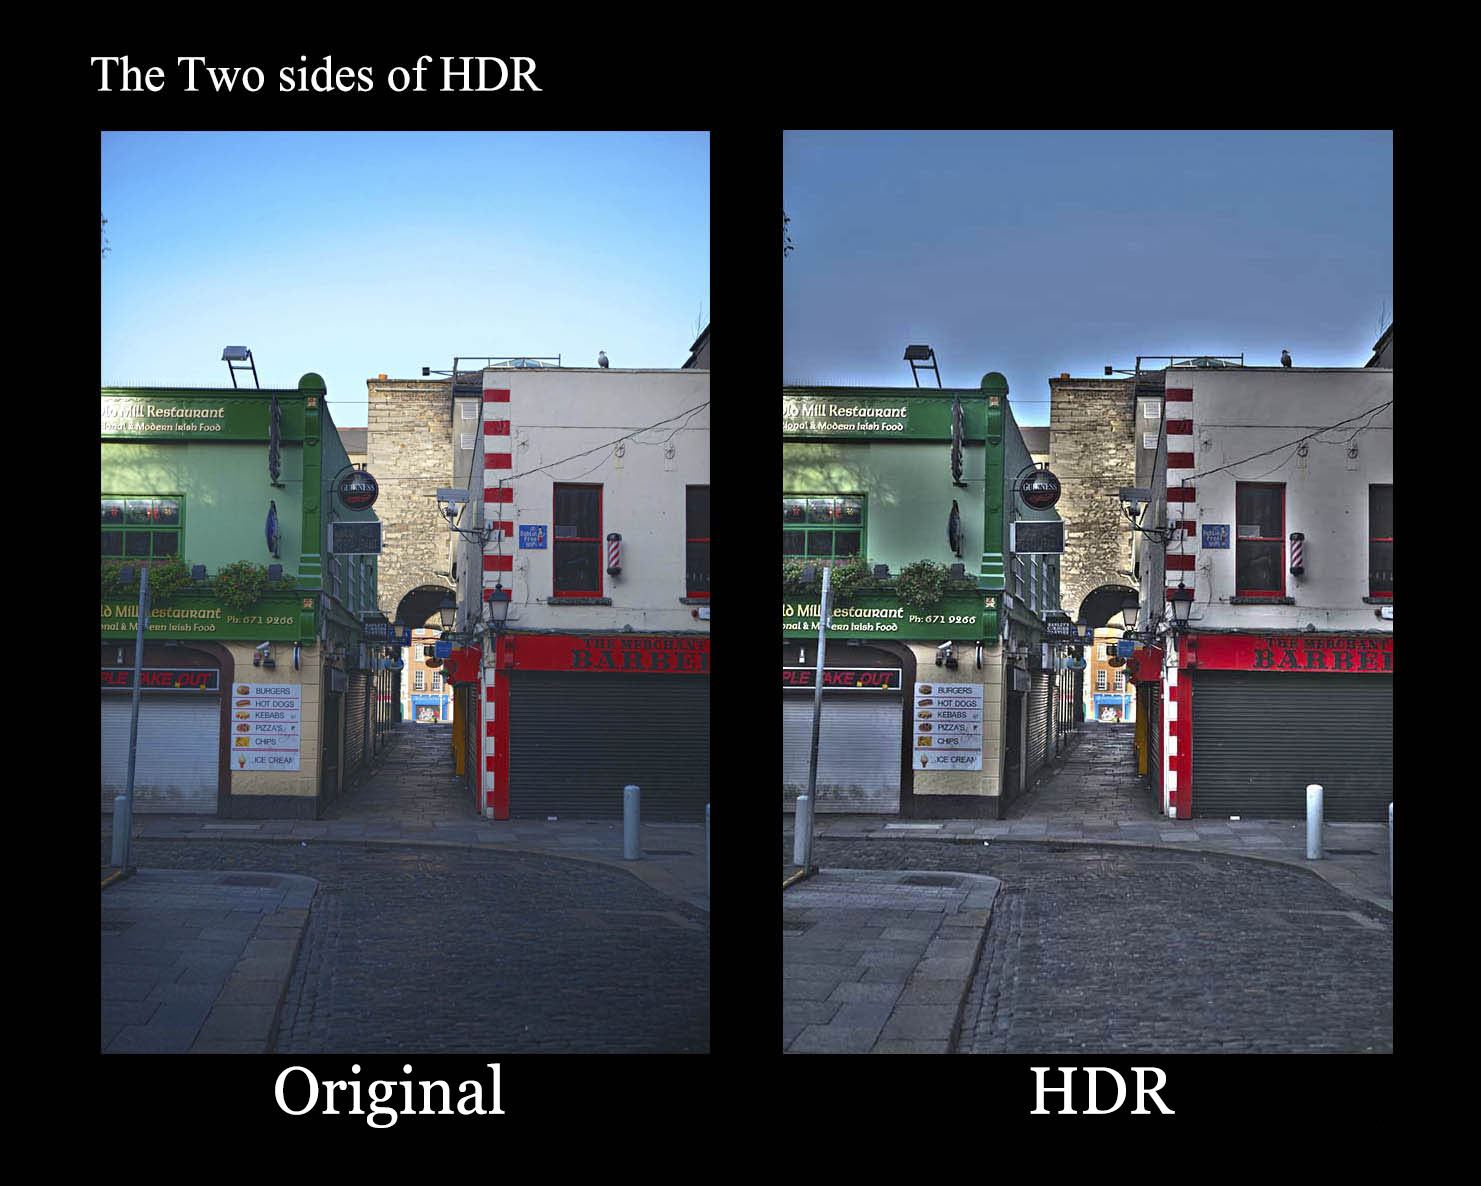
HDR photography enables photographers to record a greater range of tonal detail than currently available cameras can capture in a single photo. Using HDR processing allows photographers to take multiple pictures of a scene and combine them together with dramatic effect. If used to the extreme, HDR photography creates a striking and surreal image. If used sparingly, it will bring out details that wouldn’t normally be visible on the image.
The human eye can adjust to the changing light level as we scan dark to light areas in our field of view. A camera only takes a photograph in one light setting. And so, HDR processing will create an image that looks like the original scene or, depending on how it’s used, will create an image that is reminiscent of a surreal fantasy world.
Taking the Pictures
Taking a HDR photograph involves taking multiple pictures of the same subject with the camera in the exact same location at different settings then, after the pictures are taken, manipulating those three or more images in layers using HDR processing software.
Since most HDR photographs are comprised of 3 to 5 images, it is necessary to set the camera on a solid surface, such as a tripod, and use a remote trigger or cable release. The camera should not be allowed to move at all in between each image, as they need to line up later on. It’s possible to use a table, chair, or any other solid surface, but it is recommended to use a sturdy tripod.
Attached the camera to the tripod, and either a cable release or remote trigger to the camera. Then compose the image. The camera must be set to its manual functions. Then adjust the f-stop and shutter speed to best compose the scene. Take the image using the cable release or remote trigger. Then dial-down the shutter speed or f-stop by one stop. Be very careful not to move the camera, as this will cause the images to be out of line later on.
Take the picture again and repeat the dial-down process. After taking a few pictures with the camera dialed-down, repeat the process except for increasing the shutter speed or aperture opening over what it was originally set at. It might not be necessary to use all the images when processing them and, if they aren’t needed, they can be deleted later. After a few times of doing this, it will be possible to get a better idea of how to set the camera for each image.
If worried about moving the camera during the process, you can use your camera auto-bracketing function, or audio-exposure. This will let the camera take 3 images in a row at different aperture settings without the need to touch the camera. Also, if using a DSLR that allows you to lock the shutter for night photography, set that as well.
Best Time to Take HDR Photographs
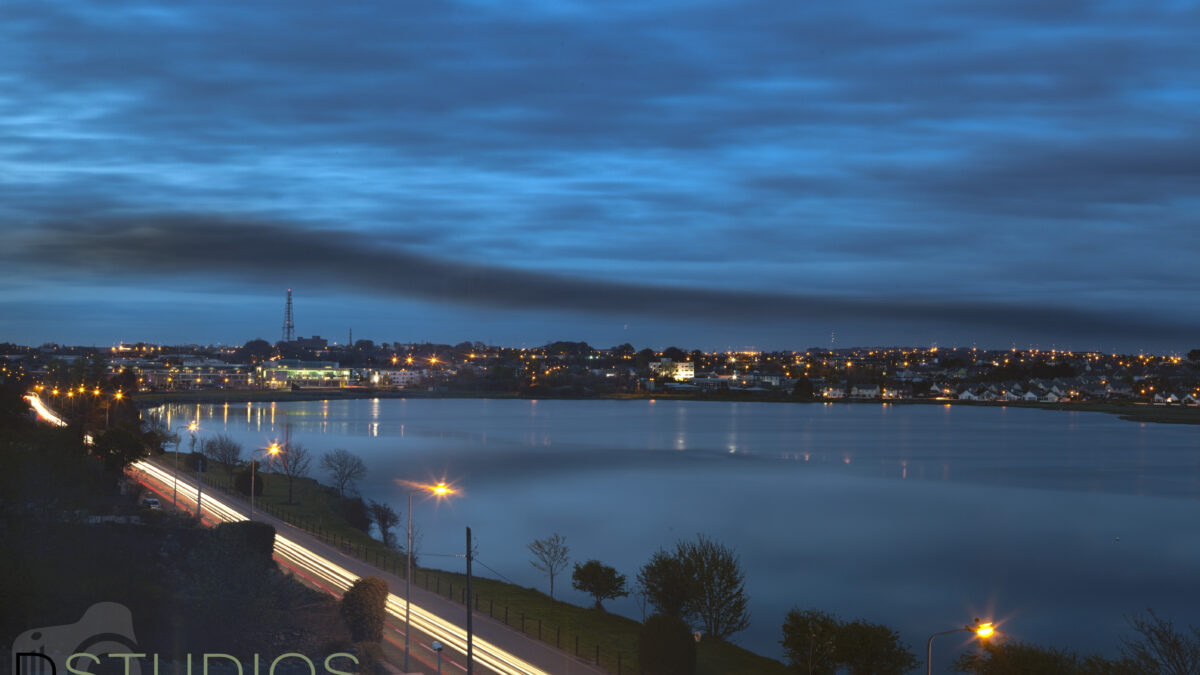
Technically HDR photographs can be taken at any time, but it’s usually best to take the photographs in lighting situations where there is a lot of contrast between the light and dark areas of a scene. For example: shooting out a window from inside a house while including the inside walls. Usually the light outside is a bit brighter, and so the camera either exposes for the interior or exterior, but cannot expose for both.
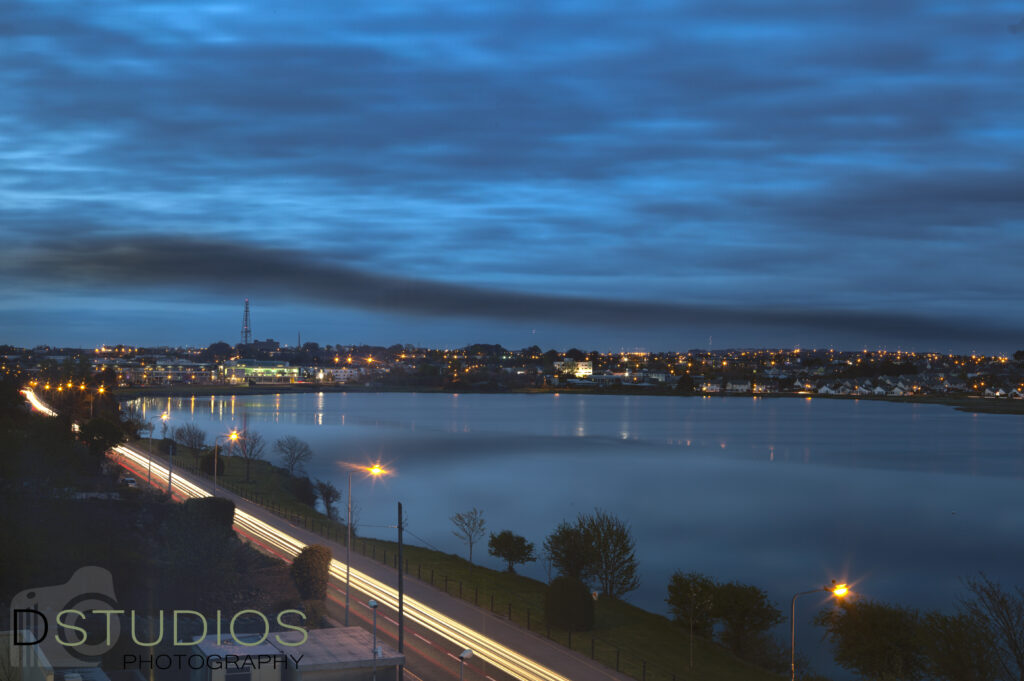
Most HDR photographs are usually taken in the evening or at night of a static subject, such as a cityscape or building. When taking a scenic picture just after dusk, the sky might still be a little bright in the foreground. The image will look either too dark in one area, or too bright in the other. If taking a picture later at night, any streetlights or other light could washout portions of the picture while leaving other areas black.
Processing the Pictures
Processing the images involves taking the captured images using different exposures, and then combines them into one photograph to create an image with a wider dynamic range, using computer software to combine multiple images with different exposures into one photograph.
The most common tool for doing this is Adobe Photoshop CC and Lightroom. Previous versions of Photoshop involved creating multiple layers and manipulating each in a time-consuming process. However the current versions of the software allow users to import the images and batch process them into one image. Then the images can be further manipulated as needed.
Photoshop, however, is an expensive piece of software, so there have been other companies to release HDR processing software. One of the more popular ones is Photomatix Pro. Photomatix Pro was designed specifically to create HDR images and is pretty easy to use. There are also some free HDR programs available that might be worth trying for a novice user before spending money one on of the other products.
Note: Many cameras and smartphones now come in with built in HDR features, allowing the effect to be processed directly in camera. However, this technique does not allow for a lot of adjustments by the user. You basically get what the camera gives you.
The Bottom Line
The HDR process can be time-consuming and sometimes frustrating for some photographers because it is not as easy as taking a regular photo. In order to get the best results, photographers need to take 3-5 photos of the same scene with different exposures. The camera needs to be set in a stable location, and to be set on manual mode so that the shutter speed, aperture and ISO settings are all consistent between shots.
High Dynamic Range Photography involves a lot of planning before taking the pictures, some patience when taking the pictures, and time spent after the pictures were taken to process them. If all is done well, the final image will be a fantastic piece of art to hang on the wall. Even though HDR photography can create interesting and dramatic effects, it can also be a time-consuming and sometimes frustrating endeavor.

